Purchase your custom passport cover in my Etsy shop {here}. Print the file as a 5x7 photo at a photo lab of your choice. Customize the information (you can add the pictures digitally at this point, or print pictures separately and glue in later) and then print off the insides of the passport using the template provided with your purchase. Now you're ready!
1. Gather supplies: Passport covers & insides, adhesive spray (or other adhesive), scissors, stapler, corner round punch, piece of cardboard, extra piece of computer paper, pen
2. Trim the insides of the passport to slightly larger than 5x7, so that you have a little bit of wiggle room when you adhere it to the cover.
3. Fold the cover & the insides in half. The insides should have the information on the inside when folded.
4. Spray the back of the cover with adhesive spray. (I recommend you do this over newspaper, cardboard, or grass, rather than a table in your house, or on concrete as the adhesive is very sticky).
5. Stick the insides onto the cover so that the information will be on the left when you open up the passport. This is also where it's helpful to have each of them folded, because it's much easier to line things up.
6. You should have some extra paper sticking out the edges of the cover.
7. Trim the extra paper with scissors.
8. This is how your passport should look when you open it.
9. Grab that extra piece of computer paper & cut it to 5x7. Fold it in half. Draw lines so that each half is separated into 4 sections. You can certainly be more precise in your measuring than I was, but it's totally up to you!
10. Place the extra sheet into the passport, and lay it all down on the cardboard with the cover facing up. Open up your stapler so that you can use it flat (or if you have a stapler with a long enough reach, then you can just staple things that way).
11. Place two staples into the crease of the cover about an inch from the top & bottom edges.
12. See. Now pull everything off the cardboard.
13. Your staples should be sticking up straight on the inside of the passport. Fold them toward each other so they lay flat.
14. We're getting there. Does your passport look like this.
15. Optional: You can use a corner punch, or scissors, to round the corners of your passport. I recommend cutting one sheet at a time, so you don't jam your punch.
16. Finished! Now you can fill it up with stamps!
Showing posts with label crafts. Show all posts
Thursday, January 15, 2015
Tuesday, February 18, 2014
New Product: Are You My Mother?
This may be my new favorite bunting! I've always loved the story "Are You My Mother" so I decided to use it to make a bunting. I paired the book pages with brown craft paper & mint green scrapbook paper. I love how it turned out! Check it out in my shop {here}.

Wednesday, February 12, 2014
Sunday, March 3, 2013
Lace Ruffle Skirt
Lately, I've seen a few ruffly skirts floating around on Pinterest & I've wanted to make one for myself for quite awhile. I bought some beautiful eyelet lace awhile back & was planning on using it to make an extender slip to wear under dresses & skirts that are just slightly too short. Because I've been working on other projects, I just never got around to using it. Then, a woman from church gave me a large tote filled with vintage lace, ribbon & other trim. I pulled out all the lace & knew that it would go perfectly with the eyelet lace I already had to make my own ruffly, lacy skirt. I had some leftover fabric from a white sheet that I used to make a ruffle shower curtain, & it was just the right size. First, here are some pictures of the finished product, and then I'll get into the details.
I love the antique lace! The eyelet lace that I bought is at the bottom, in the middle, and at the very top. Instead of gathering each of the strips of lace and fabric, I just created a few pleats as I pinned them to the base fabric. I didn't want it to be too poofy.
![]() |
| My husband was the photographer. |
![]() |
| I love that it fits me perfectly! |
![]() |
| My husband actually said, "Give me some sass!" |
![]() |
| It makes me smile to see all that beautiful lace! |
I also paired it up with a skirt over the top, to show how it can also be a pettiskirt. Now, if I have a dress or skirt that is just a little too short, I can wear it with my ruffle skirt & have some extra, lacy length!
![]() |
| Just admiring my calves! |
You won't be seeing anything you aren't supposed to when I bend over!
![]() |
| Yup, I was falling over. |
Ok, now on to some details. Using a white sheet, I cut out a rectangle that was 22 inches tall by 52 inches wide. I was very exact in my measurements. You know, I held the fabric around my waist, pulled it a ways to account for the gathering that would happen, and then cut it off. I actually measured it afterward. I used the existing hem for the bottom, which just made less work for me.
| This shows the existing hem from the sheet. The first row of lace is sewn just above the hem. |
I laid the rectangle on my cutting mat, & starting with the bottom ruffle, I started pinning the lace & fabric onto it. I didn't want each layer completely gathered, so I just created some pleats as I pinned.
| One of the pleats. They were fairly small & spaced about 5 or 6 inches apart. I varied them on each layer, kind of like when you lay bricks. |
For some of the lace layers, I paired them up with matching fabric, just so you wouldn't see the white base fabric beneath, and to give it a little more texture. I had some off-white muslin that I just tore into strips to put under the off-white lace. I used strips of the white sheet under the white lace. I didn't serge the edges, because I kind of liked the torn look. If you don't, you could certainly hem or serge the edge.
If the piece of lace wasn't quite long enough to go all the way across the skirt, I just overlapped it with another length of lace or fabric & kept going. It looks fine & gives the skirt a little more personality. Plus, I had some lace that I really wanted to use but didn't quite have enough to cover an entire row.
| View of the back |
After sewing on the last row of lace, I sewed the skirt into a tube by sewing the short edges together. I tried to match up each layer of lace as I was sewing. This will be the back of the skirt.
| View of the waistband. |
I used some 2 inch white elastic for the waistband. I tried it on around my waist, making sure it would fit snugly, then cut it & sewed it together with the edges overlapping. I just zigzag stitched over each raw edge.
I then sewed it to the top of the skirt, stretching the elastic to fit the width of the skirt.
And there you have it! A beautiful, ruffly, lacy skirt that fits perfectly! I love it & have already received so many wonderful comments on it.
Monday, January 21, 2013
Comic Book Bunting
A friend from church recently asked if I could do a custom order for a birthday party she has coming up. She wanted 5 yards of comic book bunting. She supplied the comic books & even had them cut into the triangles, and I made the bias tape & sewed them all together. Mingled with the pages from comic books were coordinating triangles of solid colored card stock. I think they turned out fabulously! Here are a couple of pictures! What do you think?
| Comic book bunting |
| Perfect for a super hero birthday party, or even just to decorate a boy's room! |
Saturday, January 12, 2013
Etsy Success
I've been keeping pretty busy lately as I've had 5 different
orders, 3 of them being custom orders, from my Etsy shop. I was telling my husband last night
that it sure is nice to have a hobby that starts to pay for itself! I'm not
really expecting to make tons of money with this business, though of course
that would be nice, I really just enjoy getting to create something every
day, and help to make other people's lives a little more crafty! I've been a
little surprised that my best sellers so far have been my paper creations rather than some of my fabric items. So far, I've sold 131 yards
of paper garland & just yesterday sold
12 yards of bunting. I had my first international sale, and
have really enjoyed working on various custom orders. I love making the garlands
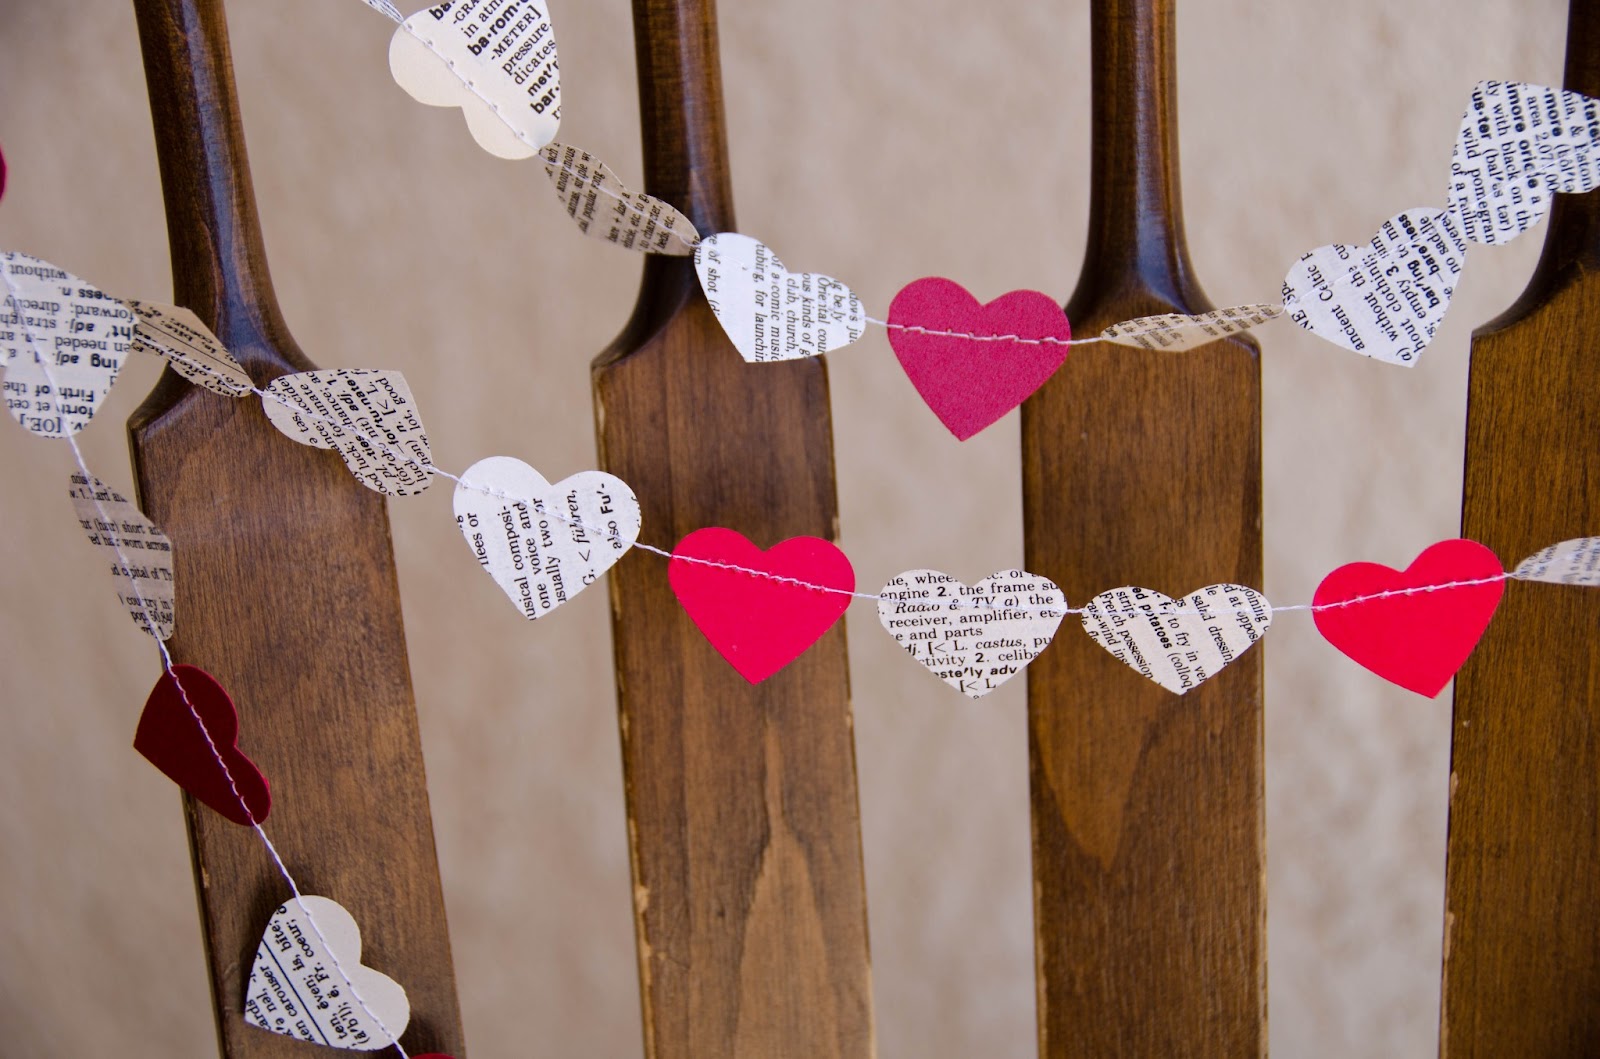
with paper hearts, which is perfect for Valentine's Day coming up! This week I
worked with a woman who asked me to make a heart garland made out of maps
& I think it turned out beautifully. Here are some pictures of what
I've been making lately. What's your favorite?
![]() |
Pink hearts with dictionary paper![]() |
![]() |
"Defining Love" - Red hearts with vintage dictionary paper hearts![]() |
![]() |
"Love Notes" - Vintage sheet music with cream hearts![]() |
![]() |
"Love on location" - 3D map hearts![]() |
Friday, December 28, 2012
Crazy for Games
For a number of years, now, the favorite game in my family has definitely been The Settlers of Catan, along with the expansion games. The first expansion we bought was The Sea Farers of Catan. We played it a lot until the more recent expansions came out, but tend to play The Cities & Knights of Catan the most, now. If you've never played the basic version, you should, plain and simple. It's a strategy game, and since the board is different every time, there's tons of replay value. Before you know it you'll be a brick trading, road building, 2 for 1 trading machine! As avid Settlers fans, we've done a few things over the years to help streamline & enhance our playing experience. A few years ago, my husband and I made a playing board to hold the hex pieces together, so they don't move around during play, and so that you can move the board from off the kitchen table if it's time for dinner. You can kind of see it in the bottom picture. We made it out of two pieces of hardboard. The bottom piece was left in a large square, and the top piece has a hole cut in the center in the shape and size of the Catan game. Then we glued them together, and it created a fabulous board!
The next enhancement we made was for our own Cities & Knights game. We like to play with more than just the normal 4 people, sometimes, so I decided to attempt to make our own 5-6 player expansion. We would actually need the expansions for both regular settlers & for Cities & Knights, so I checked what pieces we would need and set to work. I had almost the right amount of hexes from our Seafarers expansion, but needed 3 more, so I used some extra water hexes as the base, copied the front of the hexes needed, printed them off & used spray adhesive to attach them to the back of the water hexes. My husband made three sets of the wooden playing pieces using his wood working tools, and then I painted them black, pink or yellow. I also made knight stickers to go on the knight circles, and they turned out fabulously!
Our most recent goal was to create a card holder to house all the cards needed for a game of Cities & Knights. My technically minded dad, and my creative husband (along with a little input from their wives to help with design) figured out a decent design, and built a prototype for the holder. It turned out great! You can see it in the top right photo. The card holder is angled upward toward the back, so the cards overlap a little on each level. It holds all the cards, including the victory point cards you win when you conquer the barbarians. We used it during the next game we played, and it was so nice to have all the cards organized, without needing to straighten the piles during the game. It was easy to see all the cards, and I'm sure we'll get plenty of use from the organizer. Another nice thing about the holder design, it fits perfectly into the Cities & Knights box!
So, now that I've revealed how crazy we are about board games in general & Settlers of Catan particularly, what are some games that your family is nuts over? Have you made anything to streamline your game play? Or are we just a weird family? =) Have a happy new year!
Monday, December 17, 2012
Vintage Book & Pink Paper Circles Garland
I've been having a bit of success lately selling my paper circles garland in my Etsy store. I just finished making 15 yards of pink, white & vintage book garland (I used pages from a vintage edition of Jane Eyre by Charlotte Bronte) and it is now available in my Etsy shop {HERE}.

Friday, August 31, 2012
The Party Details
I made a pinata for the party this year. I was inspired by the pinata on this page. I decided to make the pinata base, as well, rather than buy one. I just did a basic paper mache on a large party balloon. If you've never done paper mache, you must have skipped grade school, all you do is mix flour & water until it's thin enough to dip strips of newspaper into (or, in my case, since we don't get the newspaper, I used the Republican voting information booklet, just the section that was in Spanish). Then, dip one inch by 4 inch strips of newspaper into the flour soup, use your fingers to scrape off most of it, and apply to your balloon. Cover the whole balloon with one layer, let dry, apply another layer, let dry...repeat until you think it's thick enough. The pinata was sturdier than I thought it would be. I only did 3 layers of paper mache, and instead of breaking when it was hit, it just got dented. Eventually it fell off of the wire hanger that I installed, so I just ripped it open for the kids. They didn't mind.
I made tissue paper pom-poms in each color of the rainbow, just using the basic tutorial from Martha Stewart. I hung them up over our dining table light using push pins and fishing line.
For the cake, I just used two basic Devil's Food Cake boxed cake mixes & 1 1/2 tubs of store-bought cream cheese frosting. I used 3 layers of cake & just used the cream cheese frosting between the layers. I used an offset spatula to get the outside nice and smooth (it could have been smoother, but she's 3 years old and doesn't really care). I used this recipe to make the marshmallow fondant. I did have a problem with the fondant being too dry & crumbly, and it didn't mix together well, so I squished as much of it together as I could & threw it in the microwave for about 15 seconds & it mixed perfectly after that. I divided it into 7 sections & added this food coloring to make the 7 colors. After icing the cake, I rolled out the fondant & cut out a bunch of circles & two stripes in each color. The circles went around the side & the stripes went on top in rainbow order. I made the pom pom bunting with two skewers, white yarn & leftover tissue paper circles from the pinata just stapled onto the yarn. (By the way, I made that cake stand using a dollar store plate & a thrift store goblet)
As you can see, Sharon was pretty excited about it. All in all, none of these things were really difficult, just time consuming. I love doing it, especially when I can see how happy it makes Sharon!
I made tissue paper pom-poms in each color of the rainbow, just using the basic tutorial from Martha Stewart. I hung them up over our dining table light using push pins and fishing line.
For the cake, I just used two basic Devil's Food Cake boxed cake mixes & 1 1/2 tubs of store-bought cream cheese frosting. I used 3 layers of cake & just used the cream cheese frosting between the layers. I used an offset spatula to get the outside nice and smooth (it could have been smoother, but she's 3 years old and doesn't really care). I used this recipe to make the marshmallow fondant. I did have a problem with the fondant being too dry & crumbly, and it didn't mix together well, so I squished as much of it together as I could & threw it in the microwave for about 15 seconds & it mixed perfectly after that. I divided it into 7 sections & added this food coloring to make the 7 colors. After icing the cake, I rolled out the fondant & cut out a bunch of circles & two stripes in each color. The circles went around the side & the stripes went on top in rainbow order. I made the pom pom bunting with two skewers, white yarn & leftover tissue paper circles from the pinata just stapled onto the yarn. (By the way, I made that cake stand using a dollar store plate & a thrift store goblet)
As you can see, Sharon was pretty excited about it. All in all, none of these things were really difficult, just time consuming. I love doing it, especially when I can see how happy it makes Sharon!
Wednesday, August 1, 2012
Aviator hat & goggles
I was going through my blog reader yesterday and came across a pattern for an aviator hat and goggles. I thought it was so cute & decided to make some for Sharon, since she so loves the movie Up right now. I mean, who doesn't love the movie Up. I might just have to make myself a set so I can pretend to be Ellie, too! So here is the link to the pattern. She has some pictures of the finished product & a printable pattern, but doesn't really include much in the way of instructions. She has 4 printable pages of the pattern, & I just copied them into Word & made them the same size as a sheet of paper, so that they would print full size.
Then you cut them out & tape together the top pieces & the bottom pieces, matching up the writing on each piece. Cut out two of the hat shaped piece & just one of the rectangle. If you want a lining, cut out the same amount from the lining fabric. For my outer fabric, I used some corduroy pants that I've had lying around in my fabric stash. I used a fat quarter for the inner fabric. The way you sew it together is by sewing the rectangle along crown of one of the hat pieces. Then, sew the other long side of the rectangle to the other hat piece. Make sure you don't just sew the hat shaped pieces to each other, otherwise it definitely won't fit any head. Then sew the lining fabric the same way. Turn the outer hat inside out, then insert the lining hat into it so that right sides are facing. Sew all around the edge, leaving a space for turning. Trim the corners on the straps & then turn everying right side out. Top stitch around the edge, making sure to enclose the space you left for turning.
I made the goggles in the same way she made hers, basically just made a paper pattern that looked good and then placed it on top of a double layer of felt and sewed around the edge. They were super simple to make. Sharon thought they were so fun! Hopefully this isn't the only time she wears them!
Then you cut them out & tape together the top pieces & the bottom pieces, matching up the writing on each piece. Cut out two of the hat shaped piece & just one of the rectangle. If you want a lining, cut out the same amount from the lining fabric. For my outer fabric, I used some corduroy pants that I've had lying around in my fabric stash. I used a fat quarter for the inner fabric. The way you sew it together is by sewing the rectangle along crown of one of the hat pieces. Then, sew the other long side of the rectangle to the other hat piece. Make sure you don't just sew the hat shaped pieces to each other, otherwise it definitely won't fit any head. Then sew the lining fabric the same way. Turn the outer hat inside out, then insert the lining hat into it so that right sides are facing. Sew all around the edge, leaving a space for turning. Trim the corners on the straps & then turn everying right side out. Top stitch around the edge, making sure to enclose the space you left for turning.
I made the goggles in the same way she made hers, basically just made a paper pattern that looked good and then placed it on top of a double layer of felt and sewed around the edge. They were super simple to make. Sharon thought they were so fun! Hopefully this isn't the only time she wears them!
Sunday, July 8, 2012
Diaper Cakes
We just got back from a family reunion, and while there, my sister and I threw a surprise baby shower for our two sisters that are both pregnant and expecting boys. I had so much fun making things for the shower & one of the items that I made for each of them was a diaper cake. I bought a box of 108 size one diapers & used 54 for each cake. The bottom layer used 27 diapers, the middle used 17 and the top used 10. Inside, I included a burp cloth, a onesie, teething ring, pacifier, pacifier clip, baby powder, and the sample pack of Johnson & Johnson baby care products. On the outside of the cakes I placed a stuffed animal on top, a smaller beanie baby on the side & a handmade wooden rattle. I think they turned out so well! The layers are held together with rubber bands & then I covered the bands with decorative paper & ribbon to keep them together a little more.

Saturday, September 24, 2011
Printable Subway Art
When I first saw a print of subway art, I fell in love! I'm a huge typography dork, so having art made out of words just made me happy. I gave my sister some subway art for her birthday, & I haven't been able to stop making more, so I thought I would share one with you. You should be able to click on the image, save it to your computer, & then print it at home or have it printed at a store. It comes in an 8x10 size. Oh, and I know it's for Thanksgiving, but I already have one from another site for Halloween. Maybe next year I'll make my own Halloween print. We'll see. I hope you enjoy it!
Wednesday, August 31, 2011
Giant Ruler Growth Chart
I've wanted to make a growth chart for quite awhile, and now that we are expecting Baby #2, I figured it might be a little more difficult for me to just remember the heights of the kids as the grow. So, that made it time to make the growth chart. I saw an inspiration picture online of a growth chart made to look like a giant ruler & thought it was exactly what I wanted. I bought a 6-foot length a pine 1x6, making sure it was nice and straight & didn't have any splits or crazy knots. After finding the perfect board, I bought it and brought it home. Myt husband routed the edges with a slight diagonal cut, then he sanded it and we treated the wood with a natural stain. We let it dry overnight & the next morning I got to work. I started the board at 6" instead of 0 because I want it to hang on the wall, and I'm pretty sure I won't have any kids measuring under 6". I measured and marked every inch on the board, then went back with a black paint pen & drew the lines, using a ruler as a straight edge. For the foot marks, the lines were two inches long, then I did two one inch lines & every third mark was 1 1/2". I printed the numbers, which are just Times New Roman font and 125 point. I tried just tracing the outline with a pencil and then using the paint pen to color inside the lines. That didn't work so well, so I pulled out my Silhouette & vinyl & used the blank space as a stencil. Much better, but I did still have a little bit of bleeding under the edge. While I was letting the paint dry, my daughter decided to draw a bit on the top end. So, after sanding the last foot, refinishing it, painting the lines & number 6 back on, we finally finished it with a couple coats of clear, spray-on top coat. I used the velcro picture hanging strips to hang it on the wall in my daughter's room & measured her for her 2-year birthday. She's about 31 1/2" tall now! It was definitely a good project, & not very difficult!
Thursday, February 3, 2011
The goings on
I've been up to quite a few things lately, & wanted to write some of them down so I wouldn't forget. On Tuesday we had our (women's church group) Relief Society activity at the Family History Center here in town. Those who weren't signed up on the New Family Search were helped to do so, & the rest of us learned how & became inspired to do our own family history work. Yesterday I spent a good amount of time entering our family information into a pedigree program in the hopes that I will be able to discover forgotten ancestors in the future.
I've also been working on my grandmother's quilt, which she asked me to quilt by hand. I sewed all the squares together a couple of weeks ago, & finally pulled out my quilting hoop & got started. The pattern is fairly simple, it just takes awhile to finish each square. I've included a picture of a square in progress in the hoop, & one of my first completed square. I love how it turned out! The quilt is called the Rose of Sharon & my grandma has had the squares since the 1930's & 40's. Hopefully I can finish it soon!
Sharon has been going through a growth spurt (I think). She seems to have gotten quite long all of a sudden & we were finally able to pull out the 6-9 month clothes (many of which are already too small, since she is just so long). One of her top teeth pushed through last week & the other top one is also working it's way out. They aren't the middle teeth, though, so she's going to be a little vampire soon.
We cut up & canned our half of a cow last weekend. It went pretty quickly since we had so much help. The long part was just waiting for the canners to heat up & cook. As a result of the cow, Jack has been enjoying some nice leg bones. The results of Jack enjoying leg bones, however, is not as enjoyable for the rest of us. He has been so gassy that it nearly knocks you over! There's just nothing quite like a dog fart.
Other than all of that, Sharon decided to explore the diaper pail last night & discovered the poo squishes really well. Needless to say, I did not take any pictures & immediately gave her a bath. Yuck!
Subscribe to:
Posts (Atom)